Registering Metadata
🏷 Create Individuals, Samples, and Experiments before importing data.
Isabl Data Model
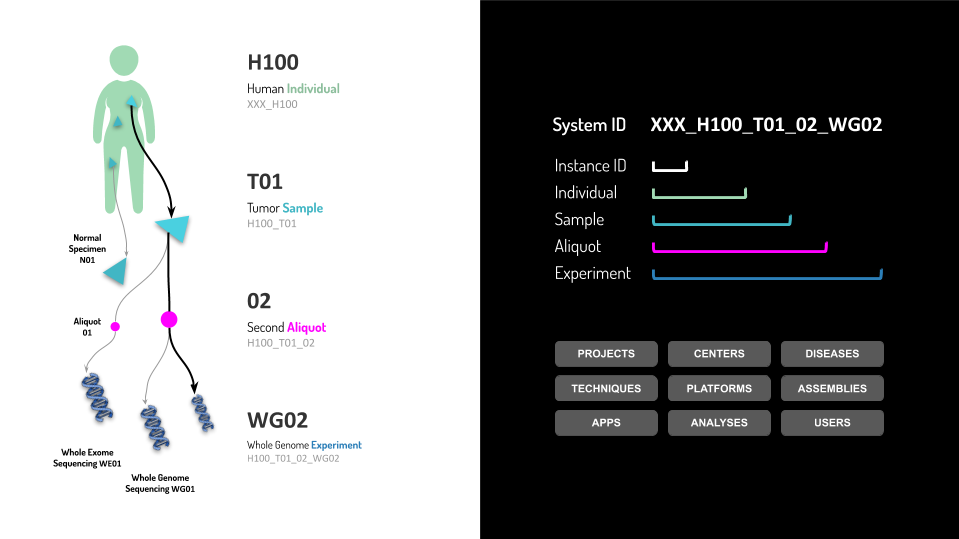
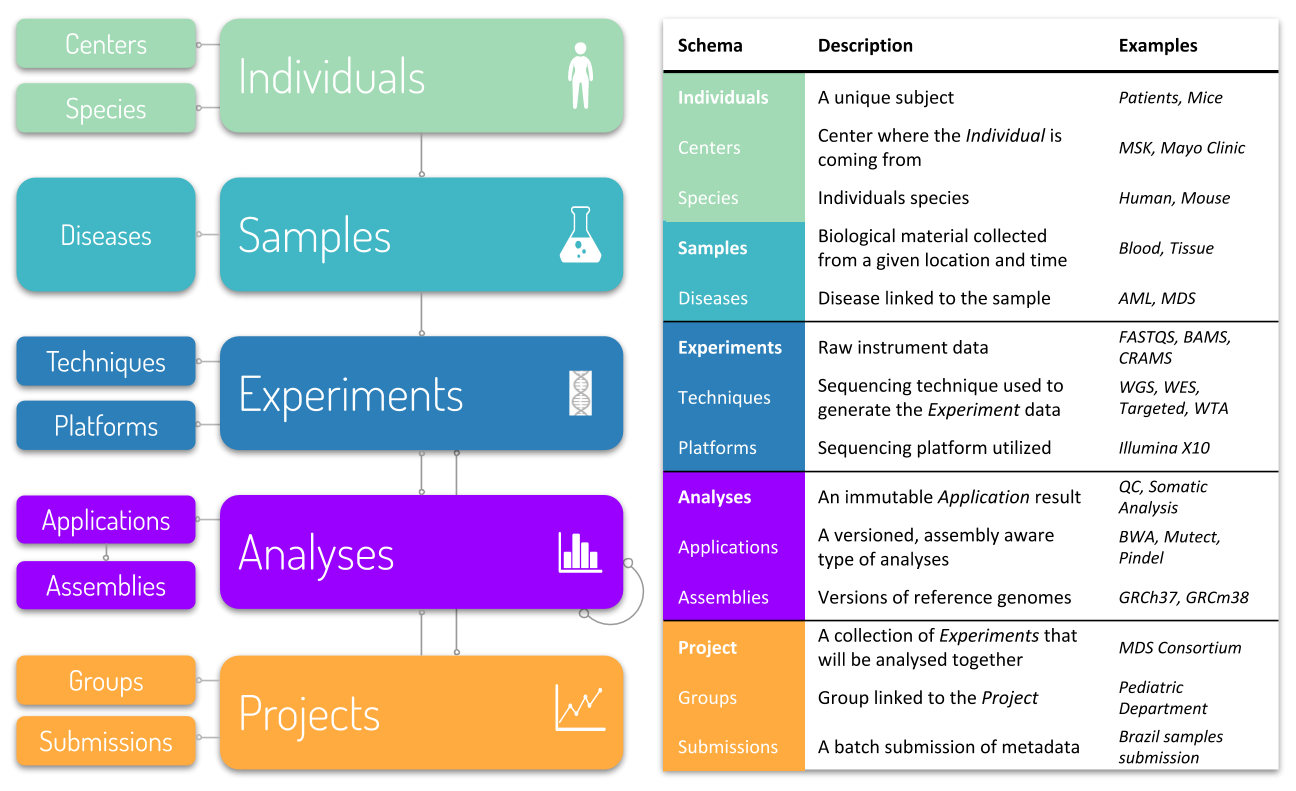
Isabl models a data generation process where Experiments such as Whole Genome Sequencing are performed on Samples collected from different Individuals. This normalization approach reduces data redundancy and improves data integrity.

Unique together constraints enable Isabl link new samples and experiments to existing records in the database. The following fields are enforced to be unique together across the entire system:
Database Schema
Unique Together Fields
Individual
Center
Species
Identifier
Samples
Individual
Sample Class
Identifier
Aliquots
Sample
Identifier
Experiments
Sample
Aliquot ID
Technique
Identifier
Applications
Name
Version
Species
Assembly
The concept of cohorts, where multiple Experiments are grouped and analyzed together, is fundamental and well supported. Furthermore, isabl also tracks and executes Assembly aware Bioinformatics Applications making sure that results are a function of the reference genome. Instances of these applications are also tracked and referred as Analyses.

Metadata Registration
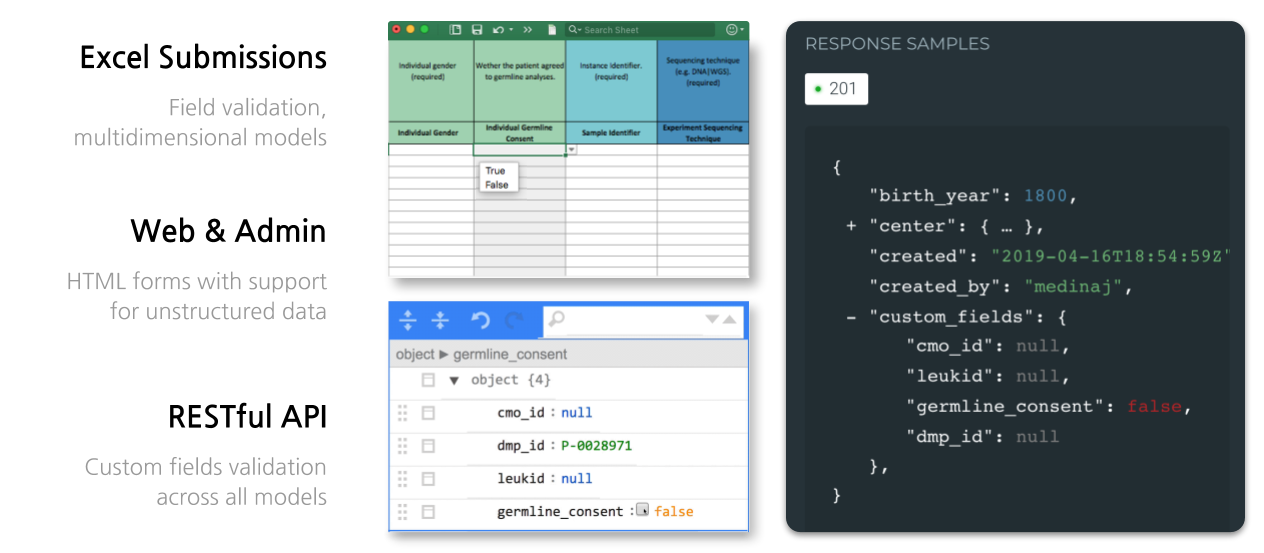
Isabl offer different mechanisms for metadata registration.

Only users with the proper permissions or superusers can create or modify models in the database, by using any of the methods for metadata registration.
When using the web interface, available buttons such as Create New Submission (+) may be hidden depending of your user role. If you're not seeing this feature, or your getting permission denied using the API, please contact your isabl administrators.
Adding Extra Choices
If you need more choices for species, gender, sample category, and technique methods, please refer to the extra choices documentation.
Sync Diseases with Onco Tree
If you are working with Cancer, you can create sync Isabl Diseases with Onco Tree. Simply run:
Register Samples with Excel
Through the web interface, is possible to import an Excel Submission to register new samples.
Note that this feature is limited to create only new Individuals, Samples and Experiments. If you need to create Centers, Diseases, Techniques, Platforms, for your available choices you need to use the Admin interface at http://<your-isabl-host>/admin/or the API method.
By clicking in Create New Submission button in the top right menu of the user, or by clicking in Add Batch Samples in the top right button of the Project view.
It will open a modal where you can download the latest Submission form by clicking GET FORM. By latest, it means it will be updated with the available custom fields, and available choices added to options like: center, diseases, platforms and techniques.
When prompted to allow macros, say yes. This will enable you to toggle between optional and required columns.
After the submission is created it can be uploaded through the web interface and a preliminary summary from the metadata submitted will be shown. This Information about the number of models that will be created (i.e. 1 Individual, 2 Samples, 4 Experiments) or errors in the submission form fields (i.e. Error: individual gender FMALE is not a valid choice) guides you in the submission process, before you can commit it.
After uploading the submission file, if you don't get any validation errors and your summary looks correct, hit the Commit Submission button to register the submission and make definitive changes in the database.

After committing your Submission, your new available samples should've been created by now, and you can visualize in the Sample Tree the relationship between the new models you just registered.

Register Samples with RESTful API and CLI
Isabl comes with a comprehensive RESTful API reference, where you can learn how to use every available endpoint for each resource of the database. You can access it by browsing to http://<your-isabl-host>/api/v1/

Create endpoints are get or create, they try to retrieve existing objects using either the primary key field or unique together constraints, and if it doesn't find a match creates a new object. If the view supports nested objects, these will also be retrieved or created using the same criteria.
IMPORTANT: If an existing object is retrieved, its fields won't be updated with the posted data.
Let's say you want to create a new Individual. According to the API documentation, we need to provide at species, gender, an identifier, and the center associated with the individual. Note that center is a nested object, you may need to create a new one or query an existing one. Let's say you want to get an existing one. This is how you'd do it with isabl_cli:
You can also make http requests directly to the API (you can create a new token from the admin site):
Manage User Groups and Permissions
Isabl offers an optional configuration of groups that you can adopt:
Group
Permissions
Managers
Can create, update, and delete Custom Fields, Individuals, Centers, Diseases, Experiments, Techniques, Platforms, Projects, and Submissions.
Analysts
Can create, update, and delete Custom Fields, Applications, Analyses, and Assemblies. They can also download analyses results.
Engineers
Engineers have the same permissions of both managers and analysts.
In order to create these groups run the following command:
These groups are optional and you can create your own using the Django Admin.
Pro tip: use the Can Download Results permission to configure what users can download analyses results in your Isabl instance.
Last updated
Was this helpful?